Model Context Protocol (MCP)
The Model Context Protocol (MCP) enables AI assistants to access WindBorne's real-time weather data through a secure, standardized interface.
Available Endpoints
All WindBorne API endpoints are accessible through MCP. With API keys, you get access to the full set:
- Observations: observations, soundings, super observations, constellation status, flying missions, flight paths, predicted paths, current location, launch sites
- Forecasts: dynamic point forecasts, interpolated point forecasts, gridded forecasts, static station forecasts, forecasted soundings, initialization times, run information, variables, historical gridded and interpolated data
- Insights: population-weighted heating and cooling degree days (HDD/CDD), calculation times
- Severe Weather: tropical cyclone tracking and prediction
With a free trial key, all endpoints are accessible (rate-limited to 5 requests per minute). Without authentication, only the documentation tools are available.
Two Modes of Operation
MCP for Claude Code
Use the Claude Code CLI to connect with header-based auth (no credentials in the URL).
-
Set API credentials as environment variables
Shellexport WB_API_KEY='$WB_API_KEY'export WB_API_KEY='$WB_API_KEY' -
Add the WindBorne MCP server
Replace WB_API_KEY with your actual credential, or use the env var from the previous step.
Shellclaude mcp add --transport http -s user windborne-api https://mcp.windbornesystems.com/mcp \claude mcp add --transport http -s user windborne-api https://mcp.windbornesystems.com/mcp \--header "Authorization: Bearer $WB_API_KEY" --header "Authorization: Bearer $WB_API_KEY" -
Test the connection
Start Claude Code and ask something like "What's the weather in New York?" to verify connectivity.
MCP for Claude
This requires the Claude desktop app. Complete these steps:
-
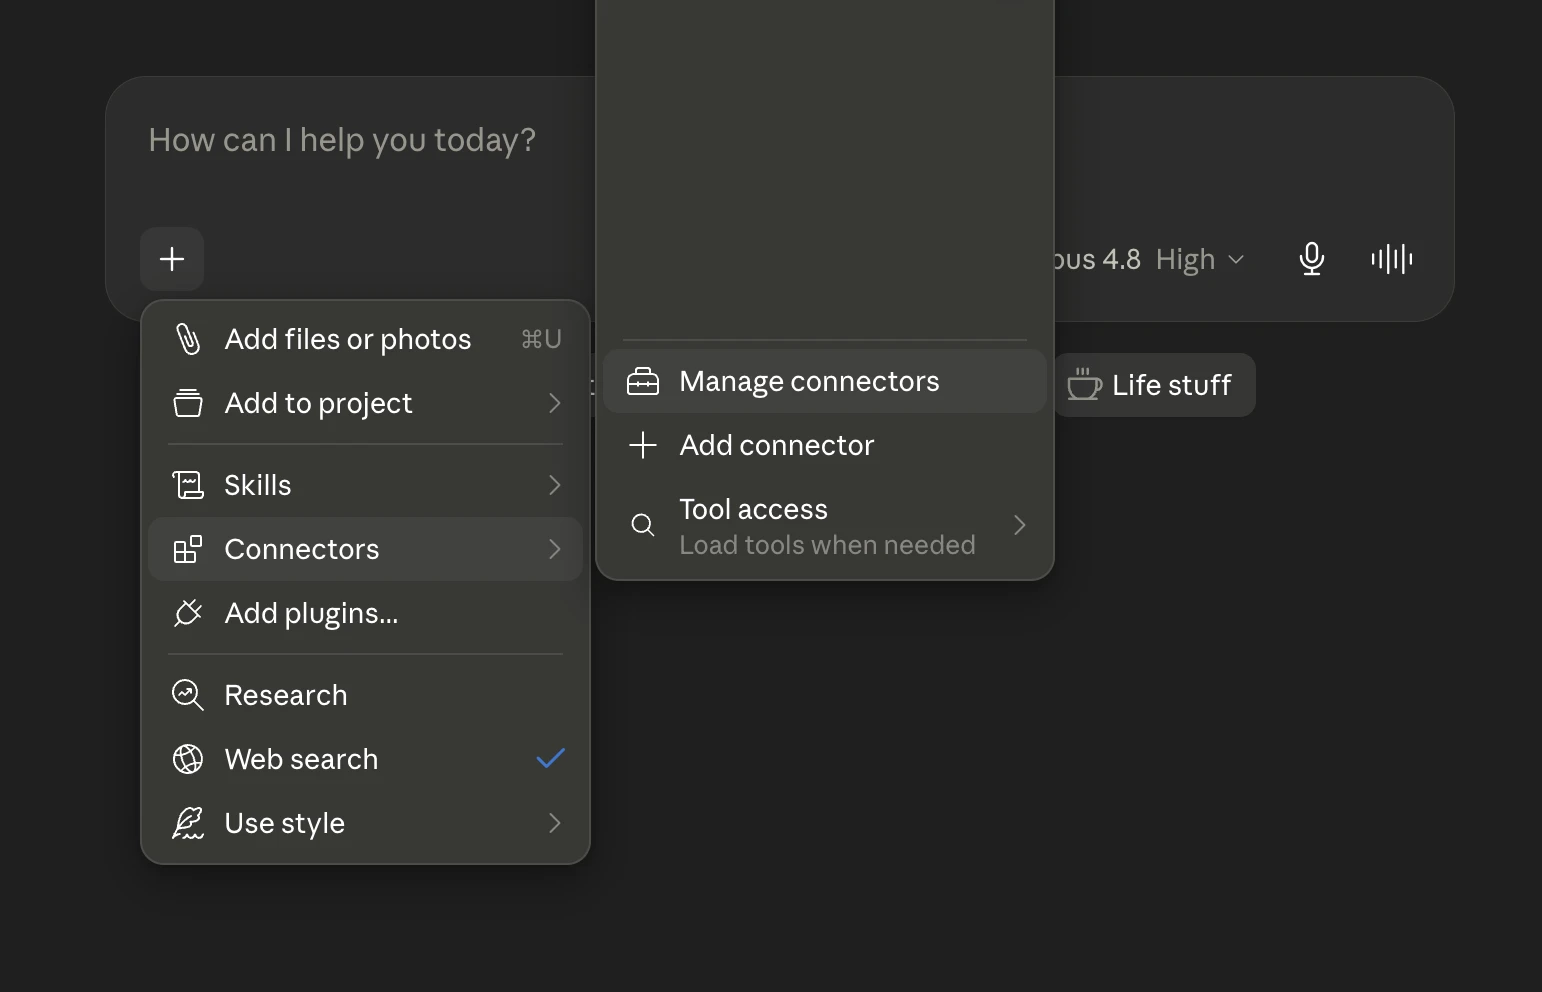
Access Connectors
Click the plus button next to the chat window, open the "Connectors" submenu, and select "Manage connectors".
-
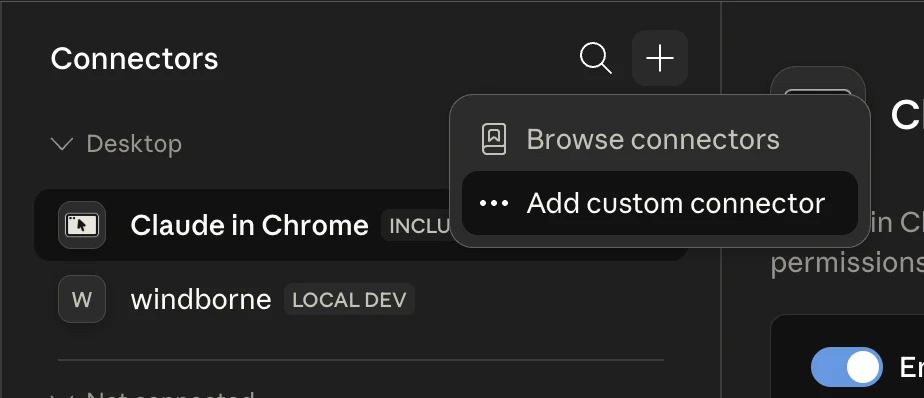
Add a Custom Connector
In the Connectors panel, click the plus button and choose "Add custom connector".
-
Configure the Connector
Name the connector and paste the URL below. Replace WB_API_KEY with your actual API key (available on the API Keys page).
https://mcp.windbornesystems.com/mcp?api_key=$WB_API_KEYhttps://mcp.windbornesystems.com/mcp?api_key=$WB_API_KEY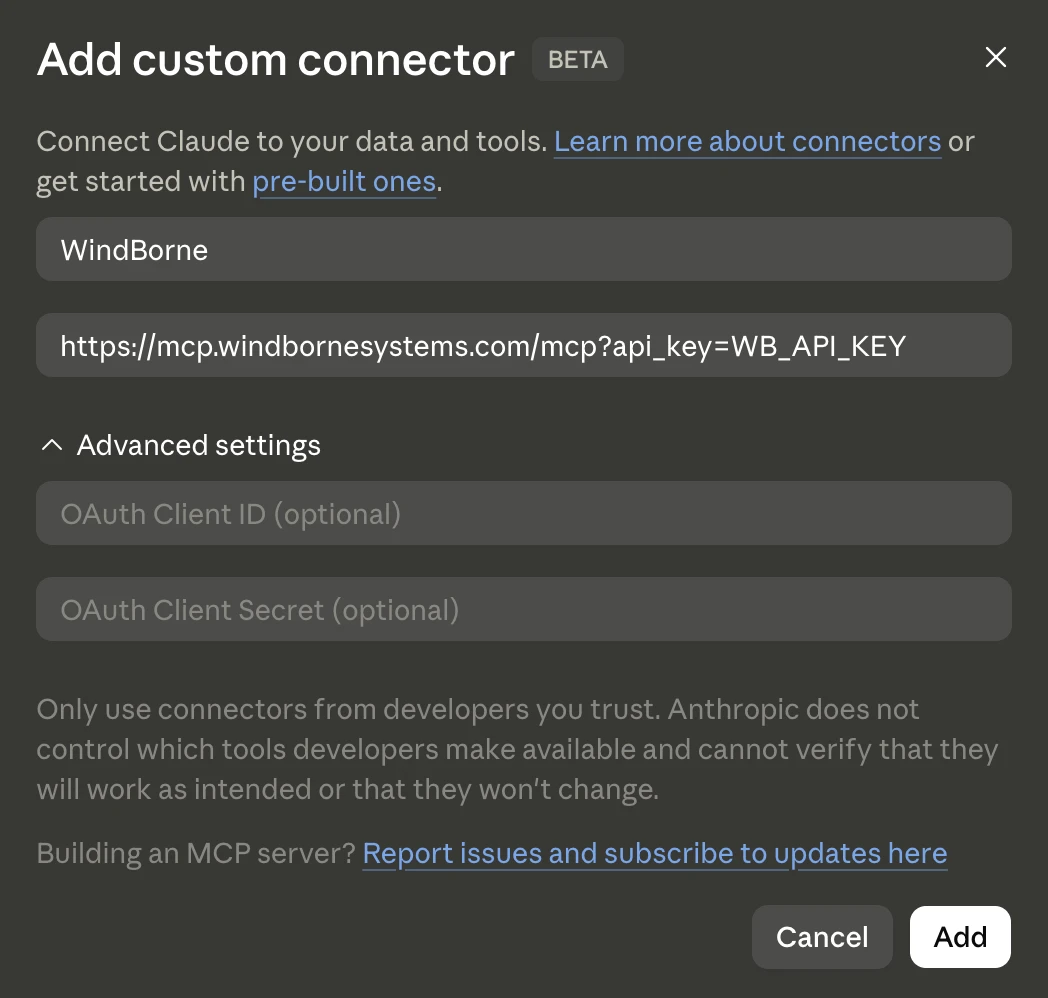
-
Test the Connection
Restart the application and test your first prompt.
MCP for Codex
This requires the Codex desktop app. Complete these steps:
-
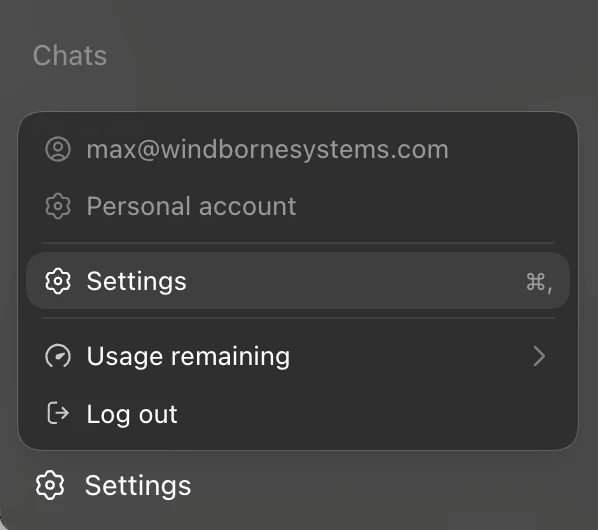
Open the Settings
Click the settings field at the bottom left of the window and select the Settings option.
-
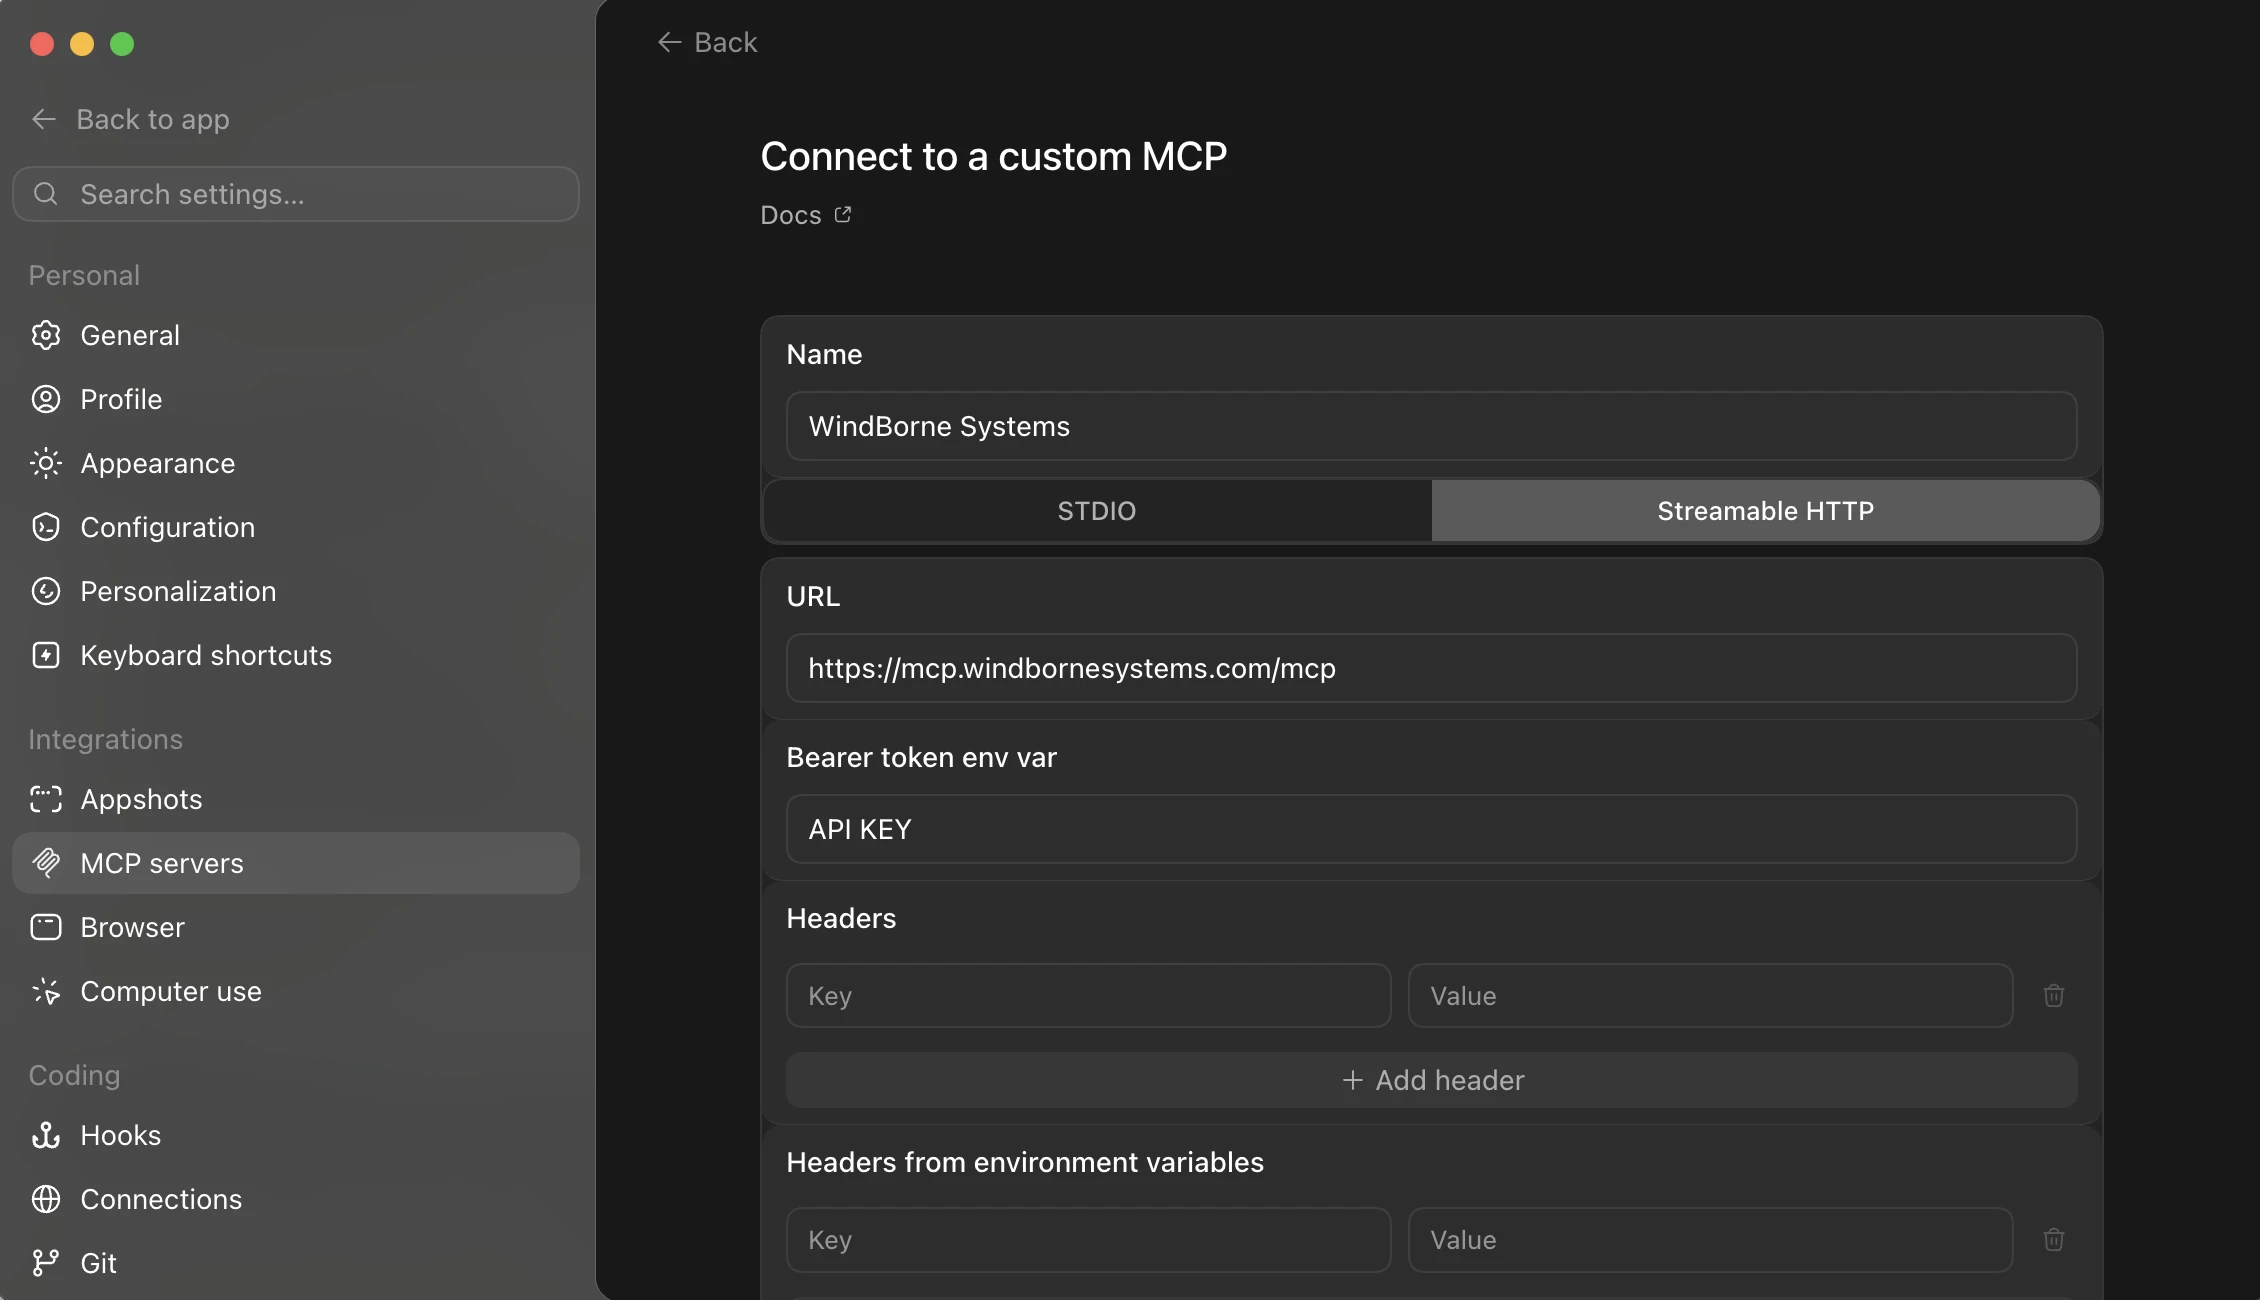
Add MCP Server Details
In the MCP servers tab, click Add server and configure a new server as Streamable HTTP with the following URL:
https://mcp.windbornesystems.com/mcphttps://mcp.windbornesystems.com/mcpSet your API key as the Bearer token env var.
-
Test the Integration
Send a prompt to test the integration.
API Docs MCP
The MCP server also provides documentation tools, available both with and without API keys. Without authentication, these are the only tools exposed. With authentication, they are available alongside the live data tools.
- read_api_docs Search and read API documentation by topic
- See all available API endpoints